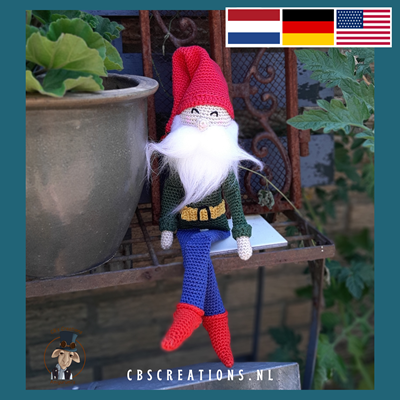
Christmas Funnies
English below - Deutsch unten
Gratis Haakpatroon Christmas Funnies
Wat zou een Kerst zijn zonder deze leuke Kerst Funnies.
Ze waren een Crochet Along in 2018 en een enorm succes!
Het patroon vind je hieronder zonder foto’s.
Wil je een PDF van het patroon inclusief de foto’s? Dat kan! Stuur me dan een berichtje op info@cbscreations.nl of vul het hier onderstaande formulier in!
Jouw e-mailadres is veilig bij mij. Als cadeautje voor het inschrijven op de Verhalen van Franklin, met nog meer tips en nieuws over (gratis) patronen, ontvang je dit gratis patroon. Je kunt je daar ook altijd weer voor afmelden als je de verhalen en tips niet langer wilt ontvangen.
Gebruikte materialen:
- Lammy Yarns Rio, katoen, 50gr/125m, Nld 3 – 3.5, voor het hoofdje: 8gr
- Restjes katoen garen, acryl en fluffy garen (voor het haar). Gebruik de kleuren die jij leuk vindt, laat je fantasie de vrije gang gaan.
- Als je verschillende diktes van garen gebruikt zou het kunnen gebeuren dat een mutsje net te groot of te klein uitvalt!
- Haaknaald 2,5 (haaknaald 3 voor het haar)
- Veiligheidsoogjes 5mm
- Schaar, naald stomp en puntig, vulling
- Nep bont pompon van ongeveer 10cm
- Sleutelringen/sleutelhanger, Versierseltjes: kraaltjes, lintjes etc.
- Eventueel karton om iets te verstevigen, Textiellijm
Wil je zelf een pompon maken, vraag dan de gratis werkbeschrijving aan:
Gebruikte steken:
L: Losse
V: Vasten
HV: Halve Vaste
HST: Half Stokje
ST: Stokje
MR: Magische Ring
2V in 1: Meerderen
2V samen: Minderen
KL: Keer Losse
Kerstman
Hoofd
Toer 1. 6V in MR (6)
Toer 2. 2V in elke V (12)
Toer 3. (1V, 2V in 1V) 6x herhalen (18)
Toer 4. (2V, 2V in 1V) 6x herhalen (24)
Toer 5. 1V, 2v in 1v, (3V, 2V in 1V) 5x, 2V (30)
Toer 6. (4V, 2V in 1V) 6x herhalen (36)
Toer 7. 1V, 2V in 1V, (5V, 2V in 1V) 5x, 4V (42)
Toer 8 – 14. 42V (42)
Toer 15. (5V, 2V samen) 6x herhalen (36)
Plaats de ogen tussen Toer 8 en Toer 9 met ongeveer 5 vasten ertussen.
Toer 16. (4V, 2V samen) 6x herhalen (30)
Toer 17. (3V, 2V samen) 6x herhalen (24)
Toer 18. (2V, 2V samen) 6x herhalen (18)
Vul het hoofdje op.
Toer 19. (1V, 2V samen) 6x herhalen (12)
Toer 20. (2V samen) 6x herhalen (6)
Maak het hoofdje dicht, hecht af en laat een lange draad om aan de pompon vast te maken.
Neus
Toer 1. 6V in MR (6)
Toer 2. (2V, 2V in 1V) 2x herhalen (8)
Toer 3. (2V samen) 4x herhalen (4)
Hecht af, laat een lange draad om vast te naaien.
Vul de neus en naai deze op het gezicht.
Muts
Rood
Toer 1. 6V in MR (6)
Toer 2 - 3. 6V (6)
Toer 4. 2V in elke V (12)
Toer 5 - 6. 12V(12)
Toer 7. (3V, 2V in 1V) 3x herhalen (15)
Toer 8 - 9. 15V (15)
Toer 10. (2V, 2V in 1V) 5x herhalen (20)
Toer 11 - 12. 20V (20)
Toer 13. (3V, 2V in 1V) 5x herhalen (25)
Toer 14 - 15. 25V (25)
Toer 16. (4V, 2V in 1V) 5x herhalen (30)
Toer 17 – 18. 30V (30)
Toer 19. (4V, 2V in 1V) 6x herhalen (36)
Toer 20 – 21. 36V (36)
Toer 22. 1V, 2V in 1V, (5V, 2V in 1V) 5x, 4V (42)
Toer 23. (6V, 2V in 1V) 6x herhalen (48)
Toer 24. 2V, 2V in 1V, (7V, 2V in 1V) 5x, 5V (54)
Eindig met 2HV. Hecht af.
Haak met fluffy garen nog 2 toeren van 54V. Keer je werk om en haak tegen de haakrichting in, zodat het meeste fluffy aan de buitenkant komt.
Hecht af.
Naai een pomponnetje boven op de muts. Vouw de muts in model, zodat het pomponnetje aan de zijkant komt en naai de muts op het hoofd.
Naai boven op de muts de sleutelring.
Haar
Neem leuk wit fluffy garen en haak een ketting van 11L, haak hierop 10V. Naai het haar op het hoofd tegen de muts aan.
Baard
Fluffy wit garen, haak eke toer 1KL en keer je werk
Toer 1. 11LToer 2 – 3. 10V (10)
Toer 4. 2V samen, 6V, 2V samen (8)
Toer 5. 2V samen, 4V, 2V samen (6)
Toer 6. (2V samen) 3x herhalen (3)
Hecht af.
Naai de baard op het gezicht.
Naai het hoofdje op een nep pompon of boven op een dekseltje. Voor het dekseltje moet je dan nog wel een overtrekje haken. ๐
Om het hoofdje op een LED-bal te maken, kun je nog een cirkeltje van fluffy haken, daar het hoofdje op naaien en dan alles op de LED-bal lijmen.
Sneeuwpop
Hoofd zie Kerstman, haak met wit
Neus
Oranje
Toer 1. 4V in MR
Toer 2. 2V in 1V, 3V
Toer 3 - 4. 5V
Hecht af, laat een draad om vast te naaien.
Naai de neus op het gezicht.
Borduur een mond.
Hoed
Zwart
Toer 1. 6V in MR (6)
Toer 2. 2V in elke V (12)
Toer 3. (1V, 2V in 1V) 6x herhalen (18)
Toer 4. (2V, 2V in 1V) 6x herhalen (24)
Toer 5. 1V, 2v in 1v, (3V, 2V in 1V) 5x, 2V (30)
Toer 6. (4V, 2V in 1V) 6x herhalen (36)
Toer 7. Alleen Achterste Lussen: 36V (36)
Toer 8 – 9. 36V (36)
Toer 10. (10V, 2V samen) 3x herhalen (33)
Toer 11 – 12. 33V (33)
Toer 13. (9V, 2V samen) 3x herhalen (30)
Toer 14. 30V (30)
Toer 15. Alleen Voorste Lussen: 30V (30)
Toer 16. (4V, 2V in 1V) 6x herhalen (36)
Toer 17. 1V, 2V in 1V, (5V, 2V in 1V) 5x, 4V (42)
Toer 18. (6V, 2V in 1V) 5x herhalen (48)
Toer 19. 2V, 2V in 1V, (7V, 2V in 1V) 5x, 5V (54)
Eindigen met 2HV.
Hecht af.
Doe een stukje karton boven in de hoed, vul de hoed op en naai deze op het hoofd.
Naai de sleutelring boven op de hoed, steek de draad door het karton heen.
Sjaal
Haak elke toer 1KL en keer je werk
Toer 1. 6L
Toer 2 – 61. 5V
Hecht af.
Knoop de sjaal om de nek van de sneeuwpop.
Naai het hoofdje op een nep pompon of boven op een dekseltje. Voor het dekseltje moet je dan nog wel een overtrekje haken. ๐
Om het hoofdje op een LED-bal te maken, kun je nog een cirkeltje van fluffy haken, daar het hoofdje op naaien en dan alles op de LED-bal lijmen.
Kerst Elfje
Hoofd, zie Kerstman
Neus, zie Kerstman
Borduur een mondje
Muts
Groen
Toer 1. 6V in MR (6)
Toer 2. 6V (6)
Toer 3. 2V in elke V (12)
Toer 4. 12V (12)
Toer 5. (3V, 2V in 1V) 3x herhalen (15)
Toer 6. 15V (15)
Toer 7. (2V, 2V in 1V) 5x herhalen (20)
Toer 8. 20V (20)
Toer 9. (3V, 2V in 1V) 5x herhalen (25)
Toer 10. 25V (25)
Toer 11. (4V, 2V in 1V) 5x herhalen (30)
Toer 12. 30V (30)
Toer 13. (4V, 2V in 1V) 6x herhalen (36)
Toer 14 – 15. 36V (36)
Toer 16. 1V, 2V in 1V, (5V, 2V in 1V) 5x, 4V (42)
Toer 17. (6V, 2V in 1V) 6x herhalen (48)
Toer 18. 2V, 2V in 1V, (7V, 2V in 1V) 5x, 5V (54)
Eindig met 2HV. Hecht af.
Haak met fluffy garen nog 2 toeren van 54V. Keer je werk om en haak tegen de haakrichting in, zodat het meeste fluffy aan de buitenkant komt.
Hecht af.
Naai een pomponnetje boven op de muts. Vouw de muts in model, zodat het pomponnetje aan de zijkant komt en naai de muts op het hoofd.
Naai boven op de muts de sleutelring.
Haar
Fluffy garen
Haak 22L.
Vlecht
Fluffy garen
Haak 3 Lossen kettingen van 25L. Maak hier een vlecht van en plaats deze op het hoofd. Naai de vlecht vast. Je kunt een klein stukje binddraad in de vlecht steken om de vlecht te kunnen buigen.
Naai hierna de muts op het hoofd. Daarna kun je de het haar op het hoofd naaien, tegen de muts aan.
Kraag
Groen
Toer 1. 6V in MR (6)
Toer 2. 2V in elke V (12)
Toer 3. (1V, 2V in 1V) 6x herhalen (18)
Toer 4. (2V, 2V in 1V) 6x herhalen (24)
Toer 5. 1V, 2v in 1v, (3V, 2V in 1V) 5x, 2V (30)
Toer 6 t/m 10 gaan we 6x herhalen op Toer 5, zodat je 6 punten aan de kraag krijgt.
Toer 6. 5V, 1KL, keren
Toer 7. 2V samen, 3V, 1KL, keren
Toer 8. 2V samen, 2V, 1KL, keren
Toer 9. 2V samen, 1V, 1KL, keren
Toer 10. 2V samen.
Hecht af.
Naai een klein pomponnetje aan elke punt.
Naai de kraag aan het hoofdje en naai het hoofdje op een nep pompon of boven op een dekseltje. Voor het dekseltje moet je dan nog wel een overtrekje haken. ๐
Het hoofdje met kraagje kun je op de LED-bal lijmen.
© 2018 Claudia Bierau Dit patroon (of delen hiervan) mogen niet worden verkocht, gekopieerd, gedeeld, gebruikt voor eigen patronen of waar dan ook gepubliceerd! Uiteraard mag je foto’s van jouw haakwerk publiceren en jouw haakwerk verkopen. Zet dan wel de naam van de ontwerper erbij!
Wil je een PDF van het patroon inclusief de foto’s? Dat kan! Stuur me dan een berichtje op info@cbscreations.nl
Jouw e-mailadres is veilig bij mij. Als cadeautje voor het inschrijven op de Verhalen van Franklin, met nog meer tips en nieuws over (gratis) patronen, ontvang je dit gratis patroon. Je kunt je daar ook altijd weer voor afmelden als je de verhalen en tips niet langer wilt ontvangen.
English
Free Crochet Pattern Christmas Funnies
What would a Christmas be without these fun Christmas Funnies.
They were a CAL in 2018 and a huge success!
The pattern can be found below without photos.
Do you want a PDF of the pattern including the photos? That's possible! Send me a message on info@cbscreations.nl
Your email address is safe with me. As a gift for subscribing to the Franklin Stories, with even more tips and news about (free) patterns, you will receive this free pattern. You can always unsubscribe if you no longer want to receive the stories and tips.
Christmas Funnies
These Funnies are fun on an LED-ball, on top of the lid of a jar, or on top of a pompon! A nice little project in between!
Used Materials:
- Lammy Yarns Rio, cotton, 50gr/125m, Nld 3 – 3.5, fort he head: 8gr
- Little bits of cotton, acrylic and fluffy (for the hair) yarn. Use the colours you like, let your imagination do the work.
- If you use yarn of different thicknesses it could happen that a hat is too big or too small!
- Crochet hook 2,5 (crochet hook 3 for the hair)
- Safety eyes 5mm
- Scissors, needle (blunt and pointed), fibrefill
- Fake fur pompon of app. 10cm
- Keyrings/keychains, Decorations: beads, ribbons etc.
- Cardboard, Textile glue
How you can make a fake fur pompon yourself, you can find the free tutorial here:
Used stitches and abbreviations (US):
CH: Chain Stitch
SC: Single Crochet
SLST: Slip Stitch
HDC: Half Double Crochet
DC: Double Crochet
MR: Magical Ring
2SC in 1: Increase
2SC together: Decrease
Santa
Head
Rnd. 1. 6SC in MR (6)
Rnd. 2. 2SC in every SC (12)
Rnd. 3. (1SC, 2SC in 1SC) repeat 6x (18)
Rnd. 4. (2SC, 2SC in 1SC) repeat 6x (24)
Rnd. 5. 1SC, 2SC in 1SC, (3SC, 2SC in 1SC) 5x, 2SC (30)
Rnd. 6. (4SC, 2SC in 1SC) repeat 6x (36)
Rnd. 7. 1SC, 2SC in 1SC, (5SC, 2SC in 1SC) 5x, 4SC (42)
Rnd. 8 – 14. 42SC (42)
Rnd. 15. (5SC, 2SC together) repeat 6x (36)
Put the eyes between Rnd. 8 and Rnd. 9 with 4 or 5 SC in between
Rnd. 16. (4SC, 2SC together) repeat 6x (30)
Rnd. 17. (3SC, 2SC together) repeat 6x (24)
Rnd. 18. (2SC, 2SC together) repeat 6x (18)
Stuff the head
Rnd. 19. (1SC, 2SC together) repeat 6x (12)
Rnd. 20. (2SC together) repeat 6x (6)
Close the head, fasten off and leave a long thread to attach the pompon to the head.
Nose
Rnd. 1. 6SC in MR (6)
Rnd. 2. (2SC, 2SC in 1SC) repeat 2x (8)
Rnd. 3. (2SC together) repeat 4x (4)
Fasten off, leave a long thread to sew.
Stuff the nose and sew it on the face.
Hat
Red
Rnd. 1. 6SC in MR (6)
Rnd. 2 - 3. 6SC (6)
Rnd. 4. 2SC in every SC (12)
Rnd. 5 - 6. 12SC (12)
Rnd. 7. (3SC, 2SC in 1SC) repeat 3x (15)
Rnd. 8 - 9. 15SC (15)
Rnd. 10. (2SC, 2SC in 1SC) repeat 5x (20)
Rnd. 11 - 12. 20SC (20)
Rnd. 13. (3SC, 2SC in 1SC) repeat 5x (25)
Rnd. 14 - 15. 25SC (25)
Rnd. 16. (4SC, 2SC in 1SC) repeat 5x (30)
Rnd. 17 – 18. 30SC (30)
Rnd. 19. (4SC, 2SC in 1SC) repeat 6x (36)
Rnd. 20 – 21. 36SC (36)
Rnd. 22. 1SC, 2SC in 1SC, (5SC, 2SC in 1SC) 5x, 4SC (42)
Rnd. 23. (6SC, 2SC in 1SC) repeat 6x (48)
Rnd. 24. 2SC, 2SC in 1SC, (7SC, 2SC in 1SC) 5x, 5SC (54)
End with 2 SLST. Fasten off.
Crochet 2 more Rnds of 54SC with white fluffy yarn. Before doing so, you’re your work and crochet the other way around. This way all the fluffy will be at the outside of the hat.
Fasten off.
Sew a little pompon on top of the hat. Fold the hat, the little pompon must be on the side of the hat. Sew the hat on the head.
Sew on top of the head a keychain.
Hair
Take some nice fluffy white yarn and make a chain of 11CH. From 2nd CH: 10SC. Sew the hair on the head close to the hat.
Beard
Fluffy white yarn, make at the end of every Rnd. 1CH and turn
Rnd. 1. 11CH
Rnd. 2 – 3. From 2nd CH: 10SC (10)
Rnd. 4. 2SC together, 6SC, 2SC together (8)
Rnd. 5. 2SC together, 4SC, 2SC together (6)
Rnd. 6. (2SC together) repeat 3x (3)
Fasten off.
Sew the beard on the face.
Sew the head on the fake fur pompon or on top of a jar lid. Make a nice cover for the lid of the jar. ๐
To attach the head on a LED-ball, you could make a little circle of fluffy yarn. Sew the head on the circle and glue it on the LED-ball.
Snowman
Head, see Sante, with withe
Nose
Orange
Rnd. 1. 4SC in MR
Rnd. 2. 2SC in 1SC, 3SC
Rnd. 3 - 4. 5SC
Fasten off, leave a thread to sew.
Sew the nose on the face.
Embroider a mouth.
Hat
Black
Rnd. 1. 6SC in MR (6)
Rnd. 2. 2SC in every SC (12)
Rnd. 3. (1SC, 2SC in 1SC) repeat 6x (18)
Rnd. 4. (2SC, 2SC in 1SC) repeat 6x (24)
Rnd. 5. 1SC, 2SC in 1SC, (3SC, 2SC in 1SC) 5x, 2SC (30)
Rnd. 6. (4SC, 2SC in 1SC) repeat 6x (36)
Rnd. 7. Back Loops Only: 36SC (36)
Rnd. 8 – 9. 36SC (36)
Rnd. 10. (10SC, 2SC together) repeat 3x (33)
Rnd. 11 – 12. 33SC (33)
Rnd. 13. (9SC, 2SC together) repeat 3x (30)
Rnd. 14. 30SC (30)
Rnd. 15. Front Loops Only: 30SC (30)
Rnd. 16. (4SC, 2SC in 1SC) repeat 6x (36)
Rnd. 17. 1SC, 2SC in 1SC, (5SC, 2SC in 1SC) 5x, 4SC (42)
Rnd. 18. (6SC, 2SC in 1SC) repeat 5x (48)
Rnd. 19. 2SC, 2SC in 1SC, (7SC, 2SC in 1SC) 5x, 5SC (54)
End with 2SLST.
Fasten off.
Put a cardboard circle in the top of the hat, stuff the hat and sew it on the head.
Sew the keychain on top of the head, put the needle trough the cardboard.
Scarf
Crochet at the end of very Rnd. 1Ch and turn
Rnd. 1. 6CH
Rnd. 2 – 61. 5SC
Fasten off.
Tie the scarf around the neck of the snowman.
Sew the head on the fake fur pompon or on top of a jar lid.
Make a nice cover for the lid of the jar. ๐
To attach the head on a LED-ball, you could make a little circle of fluffy yarn.
Sew the head on the circle and glue it on the LED-ball.
Christmas Elf
Head, see Santa
Nose, see Santa
Embroider a mouth
Hat
Green
Rnd. 1. 6SC in MR (6)
Rnd. 2. 6SC (6)
Rnd. 3. 2SC in every (12)
Rnd. 4. 12SC (12)
Rnd. 5. (3SC, 2SC in 1SC) repeat 3x (15)
Rnd. 6. 15SC (15)
Rnd. 7. (2SC, 2SC in 1SC) repeat 5x (20)
Rnd. 8. 20SC (20)
Rnd. 9. (3SC, 2SC in 1SC) repeat 5x (25)
Rnd. 10. 25SC (25)
Rnd. 11. (4SC, 2SC in 1SC) repeat 5x (30)
Rnd. 12. 30SC (30)
Rnd. 13. (4SC, 2SC in 1SC) repeat 6x (36)
Rnd. 14 – 15. 36SC (36)
Rnd. 16. 1SC, 2SC in 1SC, (5SC, 2SC in 1SC) 5x, 4SC (42)
Rnd. 17. (6SC, 2SC in 1SC) repeat 6x (48)
Rnd. 18. 2SC, 2SC in 1SC, (7SC, 2SC in 1SC) 5x, 5SC (54)
End with 2SLST. Fasten off.
Crochet 2 more Rnds of 54SC with white fluffy yarn. Before doing so, you’re your work and crochet the other way around. This way all the fluffy will be at the outside of the hat.
Fasten off.
Sew a little pompon on top of the hat. Fold the hat, the little pompon must be on the side of the hat. Sew the hat on the head.
Sew on top of the head a keychain.
Hair
Fluffy yarn
Make a chain of 22CH.
A braid
Fluffy yarn
Make 3 chains of 25CH. Make a braid and put this on the head. Sew the braid on the head. You could put a little wire in the braid, so you can bend the braid.
Sew the hat on the head. Then you can sew the hair on the head, close to the hat.
Collar
Green
Rnd. 1. 6SC in MR (6)
Rnd. 2. 2SC in every SC (12)
Rnd. 3. (1SC, 2SC in 1SC) repeat 6x (18)
Rnd. 4. (2SC, 2SC in 1SC) repeat 6x (24)
Rnd. 5. 1SC, 2SC in 1SC, (3SC, 2SC in 1SC) 5x, 2SC (30)
Repeat Rnd. 6 - 10 6 times on Rnd. 5, you will have 6 points on the collar.
Rnd. 6. 5SC, 1CH, turn
Rnd. 7. 2SC together, 3SC, 1CH, turn
Rnd. 8. 2SC together, 2SC, 1CH, turn
Rnd. 9. 2SC together, 1SC, 1CH, turn
Rnd. 10. 2SC together.
Fasten off.
Sew a little pompon on every point.
Sew the collar on the bottom of the head, sew the head on the fake fur pompon or on top of a jar lid. Make a nice cover for the lid of the jar. ๐
To attach the head and collar on a LED-ball, you could use glue.
© 2018 Claudia Bierau This pattern (or parts of it) may not be sold, copied, shared, used for own patterns or published! You may of course publish pictures of your finished crochet work and sell your finished crochet work, when mentioning the designer!
Do you want a PDF of the pattern including the photos? That's possible! Send me a message on info@cbscreations.nl
Your email address is safe with me. As a gift for subscribing to the Franklin Stories, with even more tips and news about (free) patterns, you will receive this free pattern. You can always unsubscribe if you no longer want to receive the stories and tips.
Deutsch
Kostenlose Muster Christmas Funnies
Was für ein Weihnachten wäre es ohne diese lustigen Weihnachtslustigen.
Sie waren ein CAL im Jahr 2018 und ein großer Erfolg!
Das Muster finden Sie unten ohne Fotos.
Möchten Sie ein PDF des Musters mit den Fotos? Das ist möglich! Senden Sie mir eine Nachricht auf info@cbscreations.nl
Deine E-Mail-Adresse ist bei mir sicher. Als Geschenk für das Abonnieren der Franklin Stories, mit noch mehr Tipps und Neuigkeiten zu (kostenlosen) Mustern, erhalten Sie diese kostenlose Anleitung. Sie können sich jederzeit abmelden, wenn Sie die Geschichten und Tipps nicht mehr erhalten möchten.
Christmas Funnies
Diese Funnies sind schön auf eine LED-Ball/Kugel, oben auf dem Deckel eines Glases oder auf einen Pompon! Ein schönes kleines Projekt um dazwischen durch zu machen!
Materialien:
- Lammy Yarns Rio, Baumwolle, 50gr/125m, Nld 3 – 3.5, Kopf: 8gr
- Wenig Baumwolle, Acryl Garn und Fluffy (für die Haare). Verwenden Sie die Farben, die Sie mögen.
- Haben Sie verschiedene dicken Garn verwendet, kann es vorkommen, dass ein Hut einfach zu groß oder zu klein ist!
- Häkelnadel 2,5 (Häkelnadel 3 für die Haare)
- Sicherheitsaugen 5mm
- Schere, Nadel stumpf und spitz, Füllung
- Pelz Pompon von 10cm
- Schlüsselring, Dekoration: Perlen, Bändern etc.
- Karton um etwas zu stärken, Textil-Kleber
Maschen:
LM: Luft Masche
FM: Fest Masche
KM: Kette Masche
hStb: Halb Stäbchen
Stb: Stäbchen
MR: Magische Ring
2FM in 1: Zunehmen
2FM zusammen: Abnehmen
WLM: Wende Luft Masche
Weihnachtsmann
Kopf
Runde 1. 6FM in MR (6)
Runde 2. 2FM in jede FM (12)
Runde 3. (1FM, 2FM in 1FM) 6x (18)
Runde 4. (2FM, 2FM in 1FM) 6x (24)
Runde 5. 1FM, 2FM in 1FM, (3FM, 2FM in 1FM) 5x, 2FM (30)
Runde 6. (4FM, 2FM in 1FM) 6x (36)
Runde 7. 1FM, 2FM in 1FM, (5FM, 2FM in 1FM) 5x, 4FM (42)
Runde 8 – 14. 42FM (42)
Runde 15. (5FM, 2FM zusammen) 6x (36)
Augen zwischen Runde 8 und Runde 9 mit 5 FM dazwischen.
Runde 16. (4FM, 2FM zusammen) 6x (30)
Runde 17. (3FM, 2FM zusammen) 6x (24)
Runde 18. (2FM, 2FM zusammen) 6x (18)
Füllen Sie der Kopf auf.
Runde 19. (1FM, 2FM zusammen) 6x (12)
Runde 20. (2FM zusammen) 6x (6)
Schließen Sie der Kopf, abketten und lassen Sie einen langen Faden um zu nähen.
Nase
Runde 1. 6FM in MR (6)
Runde 2. (2FM, 2FM in 1FM) 2x (8)
Runde 3. (2FM zusammen) 4x (4)
Abketten, lassen Sie einen langen Faden um zu nähen.
Füllen Sie die Nase und die Nase auf der Kopf nähen.
Hut
Rot
Runde 1. 6FM in MR (6)
Runde 2 - 3. 6FM (6)
Runde 4. 2FM in jede FM (12)
Runde 5 - 6. 12FM (12)
Runde 7. (3FM, 2FM in 1FM) 3x (15)
Runde 8 - 9. 15FM (15)
Runde 10. (2FM, 2FM in 1FM) 5x (20)
Runde 11 - 12. 20FM (20)
Runde 13. (3FM, 2FM in 1FM) 5x (25)
Runde 14 - 15. 25FM (25)
Runde 16. (4FM, 2FM in 1FM) 5x (30)
Runde 17 – 18. 30FM (30)
Runde 19. (4FM, 2FM in 1FM) 6x (36)
Runde 20 – 21. 36FM (36)
Runde 22. 1FM, 2FM in 1FM, (5FM, 2FM in 1FM) 5x, 4FM (42)
Runde 23. (6FM, 2FM in 1FM) 6x (48)
Runde 24. 2FM, 2FM in 1FM, (7FM, 2FM in 1FM) 5x, 5FM (54)
Enden mit 2KM. Abketten.
Machen Sie noch 2 Runde mit Fluffy Garn mit 54FM. Wenden Sie Ihre Arbeit, so dass die flauschige auf der Außenseite kommt.
Abketten.
Nähen Sie eine kleine Pompon auf der Hut. Falten Sie den Hut im Modell, die kleine Pompon kommt auf der Seite. Nähen Sie der Hut auf dem Kopf.
Nähen Sie auf den Hut ein Schlüsselring.
Haare
Mit Fluffy Garn, machen Sie eine Kette von 11LM, wenden und 10FM hakeln. Nähen Sie die Haare auf dem Kopf gegen den Hut.
Bart
Fluffy Weiß Garn, jede Runde 1WLM und wenden
Runde 1. 11LM
Runde 2 – 3. 10FM (10)
Runde 4. 2FM zusammen, 6FM, 2FM zusammen (8)
Runde 5. 2FM zusammen, 4FM, 2FM zusammen (6)
Runde 6. (2FM zusammen) 3x (3)
Abketten.
Nähen Sie der Bart auf das Gesicht.
Nähen Sie den Kopf auf eine Pompon oder auf eine Abdeckung. Für das Cover benötigen Sie noch eine Abdeckung zu hakeln. ๐
Um den Kopf auf einer LED-Ball/Kugel zu tun, können Sie immer noch einen Kreis von flauschigen Garn hakeln. Auf den Kopf nähen und dann alles auf die LED-Ball/Kugel kleben.
Schneemann
Kopf, wie Weihnachtsman, Weiß
Nase
Orange
Runde 1. 4FM in MR
Runde 2. 2FM in 1FM, 3FM
Runde 3 - 4. 5FM
Abketten, lassen Sie einen Faden.
Nähen Sie die Nase auf der Kopf.
Sticken Sie ein Mund.
Schneemann
Hut
Schwartz
Runde 1. 6FM in MR (6)
Runde 2. 2FM in jede FM (12)
Runde 3. (1FM, 2FM in 1FM) 6x (18)
Runde 4. (2FM, 2FM in 1FM) 6x (24)
Runde 5. 1FM, 2FM in 1FM, (3FM, 2FM in 1FM) 5x, 2FM (30)
Runde 6. (4FM, 2FM in 1FM) 6x (36)
Runde 7. Nur ins hintere Maschenglied einstechen: 36FM (36)
Runde 8 – 9. 36FM (36)
Runde 10. (10FM, 2FM zusammen) 3x (33)
Runde 11 – 12. 33FM (33)
Runde 13. (9FM, 2FM zusammen) 3x (30)
Runde 14. 30FM (30)
Runde 15. Nur ins vorne Maschenglied einstechen: 30FM (30)
Runde 16. (4FM, 2FM in 1FM) 6x (36)
Runde 17. 1FM, 2FM in 1FM, (5FM, 2FM in 1FM) 5x, 4FM (42)
Runde 18. (6FM, 2FM in 1FM) 5x (48)
Runde 19. 2FM, 2FM in 1FM, (7FM, 2FM in 1FM) 5x, 5FM (54)
Enden mit 2KM.
Abketten.
Legen Sie ein Stück Karton oben in der Hut, füllen Sie den Hut und auf den Kopf nähen.
Nähen Sie auf den Hut ein Schlüsselring, stecken Sie der Draht durch den Karton.
Schal
Jede Runde 1WLM und wenden
Runde 1. 6LM
Runde 2 – 61. 5FM
Abketten.
Binden Sie den Schal um den Hals des Schneemanns.
Nähen Sie den Kopf auf eine Pompon oder auf eine Abdeckung.
Für das Cover benötigen Sie noch eine Abdeckung zu hakeln. ๐
Um den Kopf auf einer LED-Ball/Kugel zu tun, können Sie immer
noch einen Kreis von flauschigen Garn hakeln. Auf den Kopf nähen
und dann alles auf die LED-Ball/Kugel kleben.
Weihnacht Elf
Kopf, wie Weihnachtsman
Nase, wie Weihnachtsman
Sticken Sie einen Mund
Hut
Grün
Runde 1. 6FM in MR (6)
Runde 2. 6FM (6)
Runde 3. 2FM in jede FM (12)
Runde 4. 12FM (12)
Runde 5. (3FM, 2FM in 1FM) 3x (15)
Runde 6. 15FM (15)
Runde 7. (2FM, 2FM in 1FM) 5x (20)
Runde 8. 20FM (20)
Runde 9. (3FM, 2FM in 1FM) 5x (25)
Runde 10. 25FM (25)
Runde 11. (4FM, 2FM in 1FM) 5x (30)
Runde 12. 30FM (30)
Runde 13. (4FM, 2FM in 1FM) 6x (36)
Runde 14 – 15. 36FM (36)
Runde 16. 1FM, 2FM in 1FM, (5FM, 2FM in 1FM) 5x, 4FM (42)
Runde 17. (6FM, 2FM in 1FM) 6x (48)
Runde 18. 2FM, 2FM in 1FM, (7FM, 2FM in 1FM) 5x, 5FM (54)
Enden mit 2KM. Abketten.
Machen Sie noch 2 Runde mit Fluffy Garn mit 54FM. Wenden Sie Ihre Arbeit, so dass die flauschige auf der Außenseite kommt.
Abketten.
Nähen Sie eine kleine Pompon auf der Hut. Falten Sie den Hut im Modell, die kleine Pompon kommt auf der Seite. Nähen Sie der Hut auf dem Kopf.
Nähen Sie auf den Hut ein Schlüsselring.
Haare
Fluffy garn
Hakeln Sie 22LM.
Zopf
Fluffy garn
Machen Sie 3 LM-Kette von 25LM. Von hier aus einen Zöpfe machen und auf den Kopf stellen. Nähen Sie die Zöpfe auf der Kopf. Sie können ein kleines Stück Heft in das Zöpfe einlegen, um das Geflecht zu biegen.
Nähen Hut zu Kopf. Anschließend kann man die Haare auf dem Kopf nähen, gegen den Hut an.
Kragen
Grün
Runde 1. 6FM in MR (6)
Runde 2. 2FM in jede FM (12)
Runde 3. (1FM, 2FM in 1FM) 6x (18)
Runde 4. (2FM, 2FM in 1FM) 6x (24)
Runde 5. 1FM, 2FM in 1FM, (3FM, 2FM in 1FM) 5x, 2FM (30)
Runde 6 - 10 6x auf Runde 5 wiederholen, so bekommt man 6 Punkte am Kragen.
Runde 6. 5FM, 1WLM, wenden
Runde 7. 2FM zusammen, 3FM, 1WLM, wenden
Runde 8. 2FM zusammen, 2FM, 1WLM, wenden
Runde 9. 2FM zusammen, 1FM, 1WLM, wenden
Runde 10. 2FM zusammen.
Abketten.
Nähen Sie einen kleinen Pompon zu jedem Punkt.
Nähen Sie den Kragen an den Kopf und nähen Sie den Kopf auf einem Pompon oder auf einem Deckel. Für den Deckel muss man noch eine Abdeckung häkeln. ๐
Der Kopf mit Kragen kann an der LED-Kugel geklebt werden.
© 2018 Claudia Bierau. Dieses Anleitung (oder Teile davon) darf nicht verkauft, kopiert, geteilt, für eigene Anleitung verwendet oder überall veröffentlicht werden! Natürlich können Sie Fotos Ihrer Häkelarbeit veröffentlichen oder Ihrer Häkelarbeit verkaufen. Setzen Sie den Namen des Designers dabei!
Möchten Sie ein PDF des Musters mit den Fotos? Das ist möglich! Senden Sie mir eine Nachricht auf info@cbscreations.nl
Deine E-Mail-Adresse ist bei mir sicher. Als Geschenk für das Abonnieren der Franklin Stories, mit noch mehr Tipps und Neuigkeiten zu (kostenlosen) Mustern, erhalten Sie diese kostenlose Anleitung. Sie können sich jederzeit abmelden, wenn Sie die Geschichten und Tipps nicht mehr erhalten möchten.
Reactie plaatsen
Reacties
verny
Hartelijk bedankt voor de leuke patroontjes
dank je wel voor de leuke downloads
Leny Baets
Graag ontvang ik de Nederlamdstalige patronen
Dank je wel voor de leuke patroontjes !
vind ze zo schattig